Thursday, 27 June 2013

Exploring drawing with five tutors

This is a West Dean course - www.westdean.org.uk - and entailed 5 days of drawing with different tutors each day.  After the introductory weekend this is the first course in the FDAD that I have just started.

The introduction was by David Stent on Sunday night who gave a short talk on William Coldstream and Ewan Uglow.  Incredible draughtsmen who spent a long time making sure that their measurements and proportions of the individuals they drew were very accurate.  Their drawings and paintings are noticeable not least for the construction lines that remain in the work.  A hard days concentration, drawing, measuring, rejecting and re-drawing followed.  I am still not sure whether the measurements in my final drawing are correct but I do like the fore shorted foot!.  My conclusion here is that I realise I would benefit from spending more time making sure of the proportions in life drawing. Something I was aware of before but had not acted upon.


The next day something totally different. Frances Hatch http://www.franceshatch.co.uk/  aims to incorporate her emotional responses to the landscape, and often that includes her impressions of the noises around her whether they are natural such as birds and winds or mechanical such as a CD playing in the background.  Frances started by playing us some music and asking us to respond in various ways with a variety of implements and media. We were drawing on some discarded brown paper which had been crumbled and then straightened so not precious and everyone seemed prepared and ready to thrown themselves into it.  The resulting pieces covered a huge range from abstract and wild to realistic and restrained.  This set the mood for the day as we progressed through a series of exercises using collage - some from the first pieces which had been reduced to small cuttings, the discarded pieces providing useful collage material.  Frances introduced us to 'Oblique strategies" a set of cards used for making decisions - www.rtqe.net/ObliqueStrategies/.

Frances gave us all a card and asked us to consider how it could help us with the collage that we were working on.  The one given to me seemed to bear no relationship at all but gradually the thought came to me that I hadn't liked one of the marks I had made as a direct response to one of the
instructions Frances had given us.  The comment of the card led me to the thought that the mark was restricting and that I could break it - this I did with collage pieces and think the final piece benefits.

The strategy I found today when I looked was 'Define an area as 'safe' and use it as an anchor' - will have to think how that impacts on my current art project of portraits!

The third day was with Emily Ball. http://emilyball.net/    By this time most of us were flagging with the usual midweek slump of energy. Emily came in with lots of ideas and energy.  We spent some time just making marks with charcoal  - an enjoyable exercise that never fails to surprise and delight. We practised making light and dark and changing the weight of the lines - very basic but something we all need to be reminded of from time to time.  We then held hands with a partner and described the hand of the person just by touch - my drawing looked nothing like a hand unlike some of the otheres but I was surprised how much information for a drawing could be found just by touch alone.

This prepared us for the next exercise - holding a small object hidden from sight and drawing it, using
 the marks we made as a direct response to the touch and feel of the object.  I enjoyed this and I feel it has helped me to become more aware of the range of marks and how the viewer responds to them.  I had already been looking at Van Gogh's mark making in his drawings so was very aware of how boringly nondescript my mark making was.

Emily told us the aim was to "Animate the inanimate"  or to give life to the objects we were drawing by being aware of them three dimensionally and trying to give an awareness to the viewer of that.  I used the same little dried up fish as inspiration for all three drawings - amazing how they differ.

 Another exercise, again in partnership, was a drawing where we took turns to add, remove and replace elements of the drawings - this required us to respond to marks rather than being allowed to be precious about certain marks or passages which we were pleased with but that didn't necessarily balance or add to the rest. As individuals we can be very parochial and wrongly decide to keep something that we have worked hard on but which is spoiling a painting or drawing but when working with another person it is easier to see the whole and, of course, they and you, can take the decision more easily to remove, rearrange that precious part since the emotional tie isn't the same.  An interesting exercise and one I intend to utilise with mono print.

The fourth day was with Carolyn Genders - http://www.carolyngenders.co.uk/   a ceramicist so someone who automatically thinks in the round - a sharp learning curve for me.  The day was a journey from 2 dimensions to 3 back to 2 and then back  to 3 involving paper and finally clay.  Mark making was an important element again but this time noticing how marks made in 2D look when incorporated into three dimensions.  An interesting discussion regarding the difference between shape and form was not fully resolved to my mind but perhaps I need to study more 3D work and undertake a course to fully understand it.  This was only the third time I had worked in clay apart from a very disappointing evening class over thirty years ago and these latest experiences all within the last few weeks, so I was very surprised how much I enjoyed the clay.A future course is planned to help develop an awareness of the 3D which I hope will help with 2D work.

The final day was with Martin Ward http://martinward.net/gallery.htm   This was a short day being the last of the course and stared with a block of wood - we were asked to place it in a position with other elements to give it sculptural significance and drawing it.


After that we arranged for the block to be cut into two to our individual requirements - placed the two elements in a different location and
 again drew them.  Apart from being very tired and having difficulty with angles, proportions and straight lines I enjoyed the exercise.  Not much mark making in my efforts compared to most others in the group, and I was a lot less imaginative in the placement but I felt the mass of the wood was shown. I have shown placement of the blocks as the 3D is more interesting to me than my drawings.

The course developed during the week, each day standing independently but in fact building on the previous days and, I feel, coming in full circle with angles and proportions and measurement.

On reflection, I felt that I learnt something new each day, the main being that when representing something in 2D, it is essential to be aware and try to make the viewer aware of the fact that it is 3D - a variation in mark making, weight of the mark and portraying the mass of the object can help with this as well as accurate observation.

Taking time to look before plunging in with the charcoal, pencil or brush or cutting tool is the most important message I have brought away with me - something that was repeated by each and every tutor.


Sunday, 9 June 2013

Japanese Woodblock

Assignment 4 involves portraits and I have decided to try different methods for the 2 projects and assignment.  One will be a monotype using some charcoal sketches as inspiration, another will most likely by a reduction linocut and the third will be a Japanese woodblock using traditional ukiyo-e techniques http://en.wikipedia.org/wiki/Ukiyo-e .

The first two are relatively straightforward - I am working on the design and layout in preparation for the actual prints - one to be of another individual and the others to be self portraits.

In preparation of the woodblock I decided to practise techniques in cutting, colour mixing and printing.  I also have ideas for a print based around the stunning colours of the Oilseed Rape Fields at this time of the year. The sharp yellow against the bright spring green is beautiful - cliched perhaps but it has fired my imagination.

I have studied with Sara Lee http://www.saraleeartist.co.uk/ at Rabley Drawing Centre http://www.rableydrawingcentre.com/ a couple of times and decided to revisit the blocks I cut on the first course as a basis for the practise.  The design is approximate to what the final print will be and afforded a good basis for developing the marks I wanted in the fields and also to develop the colour mixes I wanted.

Sara taught us using Gouache and I have been interested to read further that this is very popular in Japan now as a medium instead of the original water based inks traditionally used.  Like all traditions, new methods and techniques are used applying new materials.

The original print at Rabley was based on tones of blue green and is printed using 5 blocks - one for each "shape" and one for the background paler green that lies beneath all the others. The paper is a yellow Japanese paper and due to the uneven inking of the block shows through the light green background.
The "cloud like" marks across the top are caused by incomplete clearing and I intended to clear them until AJ - an experienced print maker helping us as a technician on the course pointed out that they added character - so the mistakes were left as learning points and have come in useful in the further development.


I mixed an acid yellow using lemon yellow with a bit of blue to push it towards the blue spectrum and printed it to underlie the whole block - I cut additional marks in two of the fields and printed with two different shades of green on white Masa paper. I was quite pleased with the colours but wanted a blue Sky and also to try without the cloud effect

For this print the first block was blue at the top and yellow for the rest. I attempted a technique called "Bokashi" to blend the blue and yellow on the block before printing - since this is under the hill layer you can't see how successful or unsuccessful this was - it was a good opportunity to practise a difficult technique.

http://woodblock.com/encyclopedia/entries/012_03/012_03.html

 Then I spotted that I had created green fields with strips of yellow rather than yellow fields with strips of green showing through which can be seen as the oilseed rape blossoms. However I felt that the sense of distance was working well. This print is on cream Simili paper.

I cut the block for the bottom field for print number 3 and left out the top left hand field.
This is again on white Masa paper and shows the green coming through the ripening yellow. I left some of the wood between the strips wanting to pick up some of the green on top of the yellow to show texture and interest.  I do feel that the print needs the top field to balance it though as there is now too much yellow.
For the actual print I would like to
  •  experiment with the cloud shapes of the original Rabley Fields print rather than a flat sky
  • make sure that the fields shapes are balanced so that the yellow isn't so startling although that is the subject of the print, it looks better balanced by the green
  • vary the greens so that they recede better
  • print on the cream paper - it enhances the colours better than the white
  • experiment with the sky - not sure the blue works 
  •  practise the tree,hedgerow line to make it more interesting and more varied
Overall I am pleased with what I have achieved. I have practised the cutting and mixing of gouache and nori to the right consistencies and mixed them fairly evenly on the blocks, dampening the paper worked well,as did the registration process. 
 
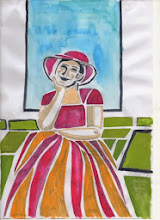
I have clearer ideas of what I want in the print of the fields and feel that the practise will stand me in good stead for the portrait I have to do for the course. I intend looking to the Fauvists for inspiration for the semi abstract approach I need. I have painted a portrait using Fauvist colours before but not used them in printmaking so it will be a challenge on all sorts of levels.

Pastel using Fauvist colours and principles


Sunday, 5 May 2013

Still Life - preparing the plate and printing the final image

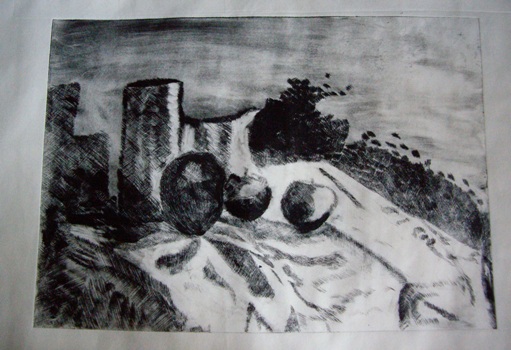
I decided on a trial run so used a small drawing as a guide and produced an A6 plate.  I was relatively pleased with the print although the major error I made of not reversing the image is very much the type of error made by a novice such as myself.


I found the repetitive mark making always meditative and quite soothing.  To keep the marks even is very difficult and will take me a great deal of time and practise to master it - if I ever manage to do so but the trial was successful enough to warrant trying it for the larger, final print for the assignment.

 
For the final image, I did remember to reverse the image and was surprised how different this was.

Although I have used the mirror technique of checking for errors in painting and drawings  before I had not noticed the difference in the "feel" of the reversed image - how changing the orientation of the flow of an image from right to left can alter ones perception of it so much. Something else to remember for future projects.


Size was dictated by the maximum size I can print on my press which is slightly larger than A4.  I use a plastic matrix for dry point and found that the concentration required for the close tonal marks required me to work in stages - I found that if I pressed on too long, the marks would vary too much. Although I would prefer to the marks to be as even as those produced by Morandi, I just do not have the expertise to produce the consistency and found myself instinctively following the curves of some of the elements. I was also surprised how hard it was to reverse the mark making to ensure the flow of the print. It is difficult to tell how the marks will print but from the plate I felt that the necessary tonal contrast had been achieved.
The assignment called for at least 5 prints, which could be the same or all different. I decided to use two different papers for the prints - a warm cream coloured Japanese Simili paper and a pure white Masa paper - this was to see how the image looked on different backgrounds   I have recently seem some etchings by Rembrandt where the same image - of Christ on the cross - was dramatically changed by where Rembrandt had chosen to wipe the ink, thus lightening the image, so I decided to experiment with varying the wiping on the prints to see how the image changed. 

For the first print on the cream paper, the plate was inked too lightly so the apples were indistinct and I also felt that the background needed some texture/tone. I was pleased with the image and felt it was quite successful. The marks could be a lot more even but this will come with practise.


With the second print, also on the cream paper, I left some tone on the background, behind the pots and above the jug. I also darkened the front pot, and wiped the apple in front of it to emphasise the tone and bring the apple forward.

With prints 3 and 4 - on white Masa paper-


I left more tone on the background but it is too uneven and the tone is too heavy at the top rather than behind the pots.  Too much ink has been removed  rather than selected to highlight the folds of the cloth  The apples are too pale.
 Prints 5 and 6 are on the cream Simili paper and I decided to emphasise the tone on the base of the front pot and the apples

 The shadow on the right side of print 5 is too faint and the shadow on the right side of print 6 is too dark but I felt that the print was getting stronger in tonal contrast

With prints 7 and 8, I decided to experiment with applying extra ink to certain areas for greater contrast using a cotton wool bud. 


This proved to a quite effective way to add back ink to small areas where the wiping had been too rigorous.  To an extent it is trail and error as the final effect cannot be evaluated until the plate has been printed but worth the experiment.
 
The final two prints are the most successful. Both on the white Masa paper and showing the individual items of the still life composition in detail with the tone of the background, shadow and cloth more balanced.


I feel Print 10 offers the best contrast in terms of tone and I found it the most interesting and effective. The dark patch of tone behind the highlight on the jug is interesting. The tone on the cloth is very random and is not as effective as it could be if I had been ore careful with this part of the image.

Reflections


  • There is a limit to the number of prints that can effectively be printed from a plastic matrix and so is not really practical when experimenting with the intention of printing an edition - in future I will use a metal plate - that will give me the opportunity to decide on how I want the image to be without compromising the edition number.

  • Since I was aiming for a tonal image, I felt that the pure white Masa paper was more effective than the cream Simili

  • The mark making is not even, and this deflects from the final image.  I need more practise in producing them in a more even manner.

  • I enjoyed experimenting with selective wiping and utilise this more in the future


Friday, 26 April 2013

Still life - a learning curve

The assignment called for setting up a still life, incorporating a fabric drape, with lighting that created sharp shadows - chiaroscuro. The choice of print matrix was left for me to decide.  While I was researching artists and print makers who produce work in this genre, I found myself obsessively drawing little still life's that I found around me. This was helpful because my ideas of what I wanted to incorporate were slowly being defined. These were all pen or pencil drawings because these are the tools that I always have lying around and mostly in my "doodle book" - the sketchbook that I keep by my chair in the living room, but spread out on anywhere and everything - my journal, receipts, magazines - anything.


The first still life I set up was full of complicated drapes and curves.


 I played around with different elements and locations and after some quick sketches I reluctantly had to admit that my skills are not good enough to do the set up justice - either printmaking or drawing. 


So I simplified the image   I found the black and white photographs useful when judging the still life and deciding what type of print matrix to use. 


Some colour sketches followed in oil pastel - here I was trying different  colours and designs, simplifying the shadows, a more abstract approach - with a nod to Ben Nicolson, sharp dark outlines inspired by Samuel Peploe and a straight forward tonal drawing.  I think they all hold potential for further development.

 
Much as I enjoyed working with the colour, I felt that I wasn't sure that I wanted to develop them into prints at this time. I came across Morandi during my research and was able to get to an exhibition of his work
 
I was inspired by his black and white etchings and decided that I wanted to try to produce a dry point using the same marks that can be seen in his prints. I developed large charcoal and pencil drawings large charcoal and pencil drawings in preparation for the plate, at this stage still looking at the design rather than trying to emulate Morandi's mark making


but with some small sketches looking at specific mark making to emulate him.  I want to try to achieve the quiet contemplative mood that his work engenders
I found that my memory of the still life set up was quite strong even after I had dismantled it and that this visual memory allowed me to continue to develop images. Although I had settled on the design and had started working on the plate, I found I was still interested in the set up and continued to develop it for future work.  This is a major step forward for me as, usually, I am quickly bored with an image and once a piece of work has been completed, rarely want to revisit it, but I have a fund of possibilities through this one piece of work that is quite exciting.

For instance, a doodle of apples and pears when listening to a speaker - doodling has always helped me concentrate - led on to a design based on abstract shadow patterns .


and a small sketch with simplified shadows


The next stage is to continue working on the plate and when it is finished print with more experimentation using  inking and wiping to vary the tones


Monday, 8 April 2013

Revisiting a previous project - collograph

Assignment 2 was all about abstract art. This is a subject I have never really been drawn to - liking a few abstract artist such as Rothko, Barbara Hepworth, Kadinsky, Ben Nicolson and Pollack but not really understanding what it was all about and without analysing why I am attracted to some and not others.

Looking at abstract paintings and prints with a more critical eye, I found it easy to identify that colour and texture appealed to me but still found difficulty in understanding what makes a good composition in abstract terms.  I have a little experience of painting abstract art from a short workshop which looked at how emotions and colours and lines are linked in our memories. This however didn’t help with the starting point for the imagery.So, I had no idea how to start this project

I have “Art of Abstract Painting” by Rolina van Vliet on my shelves and for one image she had used an aerial photograph as a starting point . I have often used imagery fleeting seen on the TV, through car windows, in books or captured in photographs as a starting point for a doodle but have never taken the idea further to try to develop it into a piece of work.   This assignment would give the opportunity to explore this to see how far I could push it. I searched through photographic books for images that had some potential. In “The Earth from the Air – 365 new days”  I found an image of the river Lippe in a flood near Olfen, Ruhr region and felt that it had possibilities.

I chose one image to work on in more detail to test whether my ideas would transfer to an abstract image. I worked one of the little thumbnails up to A4 using coloured pencil to play around with colour. I liked the colours of the earth shown in the original photograph and decided to use the same palette of colours in all three images. I then completed a quick watercolour to give the colour in the image more depth, and took the opportunity to make more generous curves than more original drawing. I made adjustments to the image and decided that, for balance the image would require some white – reserving the paper – for more interest. I then tried making the lines more geometric and finalised a design for the print based on blocks of colour, deciding on a multi-plate lino cut.

I had great difficulty with the prints, the plates were not cut well and did not register although I felt the colour was clear and reflected the landscape that the design was based on, the image is not successful as a print or as an abstract. I didn't enjoy the process at all. After a very bad - deserved - critique from my tutor, and a period of despondency, I eventually decided to revisit the image as the failure felt like unfinished business.

I  bought a little book - "starting with Abstract Painting" by Kenneth Jameson - in a second hand bookshop which was very helpful.  The book reminded me of the keys to successful design whether  realistic or abstract: 

colour:tone:texture:line:balance:form:pattern:rhythm:harmony

I used one of the ideas from the book  - cutting a photograph into uneven pieces and using one of the pieces to lead the design. This is a similar process to using a viewfinder and focusing on isolated elements. I decided to use the same source material as in the original print, and to explore some of the ideas using the image as a starting point with the intention of incorporating chine colle and/or monoprint into the final print.

I took an element from the cut photograph and started to experiment with shape and colour - one drawing leading into another drawing.


I also used collage to produce a piece to introduce a textural element. Certain strong shapes emerged in the collage that looked to provide possibilies for the print.

The textures in the collage suggested a collograph as the dense coloured texture element I wanted in the print could be achieved with quite coarse sand. I had the drawings and collage in front of me together with the original inspiration from the photograph, but I wanted the plate to be a further development rather than trying to precisely adhere to a drawn/collaged piece, so used them as inspiration rather than copying them.

The plate as made from mount board with gesso roughly spread on varying thickness on the plate and a palette knife used to create marks inspired by the previous works. Before the gesso dried I scattered rough sand in a focused way, trying to place it in specific places and shapes where I wanted certain elements of the design to be and intentionally varying the lightness and heaviness of the spread in places.

After sealing the plate, I proof inked it using ink left over from a previous print run. This was a darkish green and I used a dobber to apply it to just the raised textured part of the design. I had pre-prepared some paper so that it was damp and ready to use but the first two runs through the press required adjustment of the roller to ensure the right amount of pressure without the danger of the very sharp sand piercing through the layer of tissue and newsprint into the blanket. 

 
She uses quite strong colour which produces some delicate effects on the print which I like so decided to apply primary red and primary yellow to the plate in a considered way first with a dobber and then later with a brush. The results were varied and I realise that I need to really push the ink into the textured service to ensure that the intaglio is inked thoroughly. After inking various plates, I wanted to try the effect of adding chine colle before putting through the press.  I took photocopies of a couple of prints and used oil pastel to imitate the effect of chine colle

I liked this effect so added chine colle - tissue and thin hand made paper stained with acrylic inks in various colours  -to the next few plates, continuing to vary thickness of oil and mixing colour on the plate with the method of "rubs" that Barbara Hartill uses. I also tested out various glues to attach the chine colle - Nori paste, pritt stick and finally liquid PVA applied with a brush. The final results are interesting and provide a good basis for further experimentation.

The textures have potential but I will use carbonundrum rather than sand in the future to achieve a denser more even texture and so that there is less danger of the paper being damaged by the sharpness of the plates.

Some of the marks on the plate are too considered - for instance the radiating lines at the top and bottom are not pleasing.

I think using gesso to produce a lightly texture background emphasised in places with sand has worked and will repeat this next time I experiment

 The addition of chine colle has been effective - giving an almost watercolour effect especially on the lighter prints.

I prefer the prints that are the result of much lighter inking, the dense colour not being as attractive or giving the feel to the image that I wanted.

This set of prints are more successful than the linocuts but I am still uncertain as to whether they work as abstract images.

The assignment has been an uphill struggle from the first mark I made.  However, I have enjoyed this revisiting of the work and have allowed myself to experiment with technique, colour and a new style and will be revisiting it again to see how far I can push the image and where it takes me.